INGREDIENTS (by weight, except where indicated)
Makes 24. Cut in half if needed.
– 1 oz apple cider vinegar
– 27 fl oz soy milk at room temperature
– 1 lb 14 oz bread flour
– 22g sugar
– 16g instant yeast
– 16g salt
– 1.5 oz vegetable shortening
METHOD
TIPS:
1. Make sure to pinch the balls of dough tightly to seal the dough together. You need the good dough ball integrity (if that makes any sense) to get these to rise correctly.
2. Don’t let the dough get too warm or it will get really hard to work with. Room temperature all the way.
3. Don’t let the dough over-rise when shaped into balls. You want to bake these on the way up, so don’t let them double.
WHAT IF I DON’T HAVE A STAND MIXER?!
Never fear! You can still make these. It’s going to take some muscle but it can be done. To help you. here is a picture essay.
First, make sure to dissolve the yeast in the liquid before adding it to the flour.
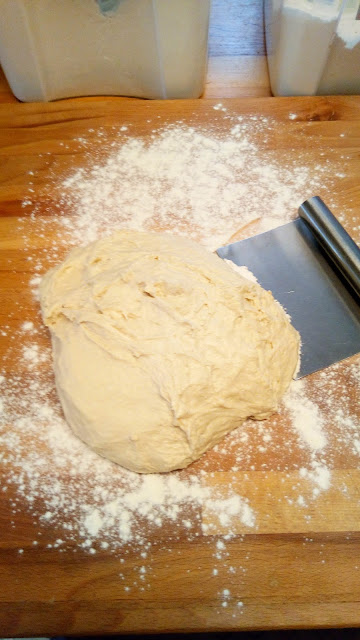
Second, use a strong wooden spoon to bring the dough together. I actually prefer this spurtle because you can muscle through the dough without too much resistance. When it looks like this, let the dough rest for a few minutes. Then get back at it. The idea is to get the dough to gather around the spurtle in a ball. A vigorous circular motion will accomplish this. If you feel the gluten offering too much resistance, let the dough rest for a few minutes and then try again. It should pull away from the sides of the bowl and gather around the spurtle.
When you have a fairly smooth dough, transfer it to to a lightly floured surface. You want enough flour to keep the dough from sticking.
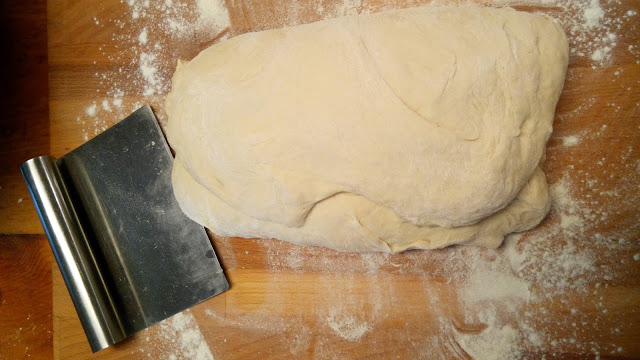
With the help of a pastry scraper, stretch and fold the dough like a letter. If you don’t know what a letter is or how to fold one, ask your parents (or maybe even your grandparents).
Rotate the dough 90 degrees and stretch and fold a second time.
Transfer the dough to a well-oiled bowl and turn to coat. With oiled hands, stretch and fold the dough a third time. Let the dough rest for 5 mins.
What you are doing is building a gluten structure, and you should feel the dough firm up as you stretch and fold. When you can shape the dough into a ball like what you see below, your stretching and folding is done. Just keep the dough and your hands oiled, and stretch and fold until you reach perfection. Then cover and let rise.
Good gluten structure will give you a good rise.
Now it’s time to shape some balls of dough! I keep the dough on my fingertips, using my thumb to push the middle of the dough down while the fingers of my other hand bring the sides of the dough up. You should feel the bounciness of the gluten and a firm ball forms and firms up. If the dough gets too sticky, just lightly oil your hands.
The key is to seal the dough into a tight ball. This will give you a good rise.
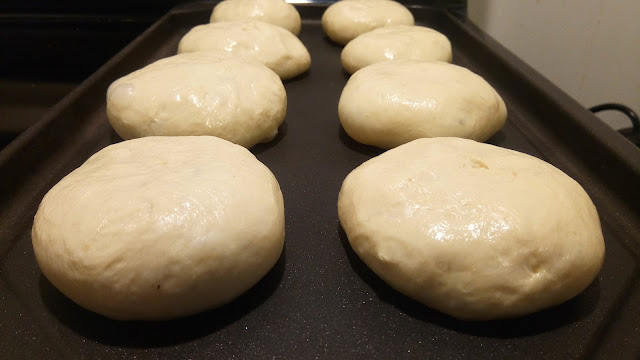
Let rise on a well-oiled piece of parchment per the recipe above.
A good griddle is your friend.
Flip and bake per the recipe above.


